Want a fast, satisfying first win at growing your own food? Start with microgreens: ready to harvest in 1–2 weeks, grown on any windowsill, with almost no gear or experience.
What are microgreens?
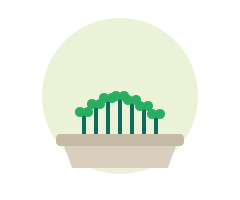
Microgreens are young vegetable and herb seedlings, picked just after the first leaves appear (usually day 7–14). They pack intense flavour for salads, sandwiches and bowls, and because you harvest so young, you skip the hard parts of gardening: no repotting, no pests, no long wait.
The easiest microgreens for beginners
Start with fast, forgiving varieties that germinate evenly:
- Radish, the champion for beginners. Sprouts fast, grows reliably, ready in under a week. Peppery flavour.
- Mustard, quick and easy, with a pleasant spicy kick.
- Broccoli, germinates evenly and grows predictably; mild flavour.
- Peas, sweet, crunchy shoots that kids love. Soak the seeds first.
- Sunflower, nutty and substantial, though slightly slower.
Avoid tiny mucilaginous seeds like chia or basil for your first try, they clump and are fiddlier.
What you need
- A shallow container, a takeaway tray works. Poke a few drainage holes in the bottom.
- Potting soil or a seed-starting mix, about 3 cm deep.
- Microgreen seeds, you can use regular garden seeds; just sow them thickly.
- A spray bottle and a bright windowsill.
How to grow microgreens, step by step
- Fill your tray with about 3 cm of moist soil and level it gently.
- Sow thickly, scatter the seeds so they nearly cover the surface. Microgreens are grown crowded on purpose.
- Cover lightly (a thin sprinkle of soil, or nothing for tiny seeds), then mist.
- Blackout for 2–3 days, cover with a lid, plate, or another tray to keep it dark and humid. This triggers fast, even germination.
- Uncover and give light once you see sprouts. Move to your brightest windowsill.
- Mist once or twice a day to keep the surface damp, never soaking.
- Harvest when they’re 5–8 cm tall with their first true leaves, usually day 7–14. Snip just above the soil with scissors.
How to avoid mold (the #1 beginner problem)
Mold is the main thing that trips beginners up, and it’s almost always caused by too much moisture and too little airflow.
Prevent mold by:
- Not overwatering, mist to keep the surface damp, not wet. Soggy soil invites mold.
- Giving airflow, once uncovered, keep them somewhere with gentle air circulation.
- Not sowing too thickly, a dense mat with no air between sprouts stays wet and moldy.
Do microgreens regrow after cutting?
Mostly no, radish, mustard, broccoli and sunflower give little or nothing after cutting, so it’s easiest to resow. Peas are the exception. Since they grow so fast, just start a fresh tray each week for a steady supply.
Once you have microgreens down, our complete beginner’s guide to growing food at home shows you what to grow next.
Want a step-by-step plan for your microgreens? UrbanLeaf tells you exactly what to do each day, from sowing to harvest, so you get it right the first time. Perfect for absolute beginners. 🌱