
Microgreens are the fastest food you can grow at home, seed to harvest in 1–2 weeks, on a windowsill, with no garden and almost no gear. But because it happens so fast, a lot of beginners aren’t sure what “normal” looks like, or when to actually cut them.
Here’s the whole journey, broken into the four growth stages, with what to do at each, and the one rule that matters most: harvest by size, not by the calendar.
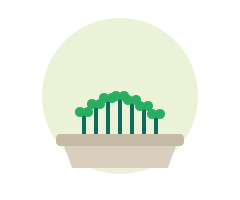
The four stages at a glance
| Stage | What it looks like | What to do |
|---|---|---|
| Seed (day 0–1) | Dry seeds on a damp growing medium | Sow, cover, keep dark and moist |
| Sprout (days 2–5) | Roots and pale shoots, seed leaves opening | Uncover to bright light, mist |
| Harvest window (days 6–14) | Green and upright, seed leaves open | Harvest at ~2–3 in (5–8 cm) |
| Baby greens (day 14+) | Larger, tougher true leaves | Past prime, harvest before this |
Stage 1 · Seed (Day 0–1): sow and cover
Spread a thin, even layer of seeds across damp growing medium (coco coir or a couple of layers of damp paper towel both work), pressed down for good contact. Sow thick, they should almost touch.
- Soak only the big seeds. Large seeds (sunflower, pea, fenugreek) sprout faster after a 6–8 hour soak. Tiny seeds (mustard, radish, broccoli, cress) can be sown dry, soaking just makes them clump.
- Use edible, untreated seeds. Kitchen seeds are perfect. Never use coated “planting” seeds (often dyed pink or blue), they’re chemically treated and not safe to eat.
- Cover the tray with a lid or plate for the first 1–2 days. Seeds germinate in the dark.
Keep it around room temperature (64–72°F / 18–22°C) and lightly moist, never soggy.
Stage 2 · Sprout (Days 2–5): uncover and get light on them
Around day 2–4 the seeds swell, push out tiny white roots, and lift the cover. This is the moment that makes or breaks your tray:
- Uncover and move to bright light as soon as they’ve sprouted. This is the single most important step.
- Give them lots of light, a bright windowsill for most of the day, or 12–16 hours under a grow light. Too little light is the #1 microgreens problem: they grow tall, thin, and floppy (“leggy”) reaching for a dim window. If they stretch and lean, they need more light, not less.
- Mist to keep the surface damp and give the tray a little airflow, stagnant, soggy trays are where mold starts.
A pale yellow-green color at first is normal; they green up within a day of light.
Stage 3 · Harvest window (Days 6–14): cut them at the right size
This is the stage everyone gets wrong. Microgreens don’t have a single “harvest day”, they have a window, and the right cue is size, not the calendar:
- Harvest once the seed leaves (cotyledons) are open and the greens are about 2–3 inches (5–8 cm) tall. You do not have to wait for true leaves.
- Fast seeds (radish, mustard, broccoli) are often ready around days 6–8. Slower seeds (cilantro, beet, fenugreek) reach size around days 10–14. Both are normal, harvest each when it hits size.
- Don’t wait too long. Past the harvest window they start becoming tougher “baby greens” with less of that tender, intense flavor.
- Snip in the morning, cutting just above the soil line with clean scissors, for the crispest greens. Rinse, pat dry, and eat fresh, that’s when the nutrition and flavor peak.
Keep watching for mold (gray, web-like fuzz on the stems, different from the harmless fine white root hairs). If you see it, snip out the patch and improve airflow.
Stage 4 · Baby greens (Day 14+): you’ve gone past prime
If you leave them, microgreens keep growing into baby greens, bigger, with developed true leaves. They’re still edible and fine for salads, but they’ve lost the tender texture and concentrated flavor that make microgreens special. For the best result, harvest in Stage 3.
Fast vs slow: how long common microgreens take
| Seed | Ready in |
|---|---|
| Radish, mustard | 6–8 days |
| Broccoli, kale, cabbage | 8–10 days |
| Sunflower, pea shoots | 8–12 days |
| Cilantro, beet, chard, fenugreek | 10–14 days |
Mixing seeds in one tray? Harvest each variety as it hits size, the fast ones first.
Common problems, by stage
- Sprout stage, leggy and pale → not enough light. Brighter spot or a grow light. This is by far the most common issue.
- Sprout stage, no germination → seeds dried out, or too cold. Keep the surface damp and near room temperature.
- Any stage, gray fuzzy mold → too wet and too still. Ease off misting, add airflow, and next time sow a touch less densely.
- Won’t regrow after cutting → that’s normal. Microgreens are one-and-done; start a fresh tray.
Start your own tray
New to microgreens? Our easiest microgreens to grow at home walks through your first tray step by step. Want more cheap wins on the windowsill? See grow herbs indoors and cut your grocery bill, and if you’re brand new to growing anything, start with the complete beginner’s guide to growing food at home.
Want your tray to tell you what to do each day? UrbanLeaf walks you through microgreens one simple daily task at a time, from sowing to the exact day your harvest window opens, so you cut them at their peak, every time. 🌱